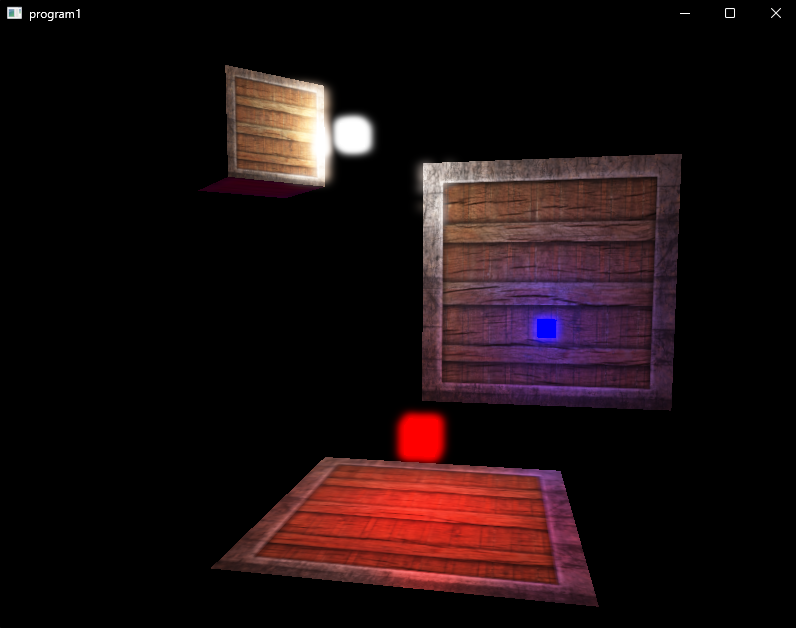
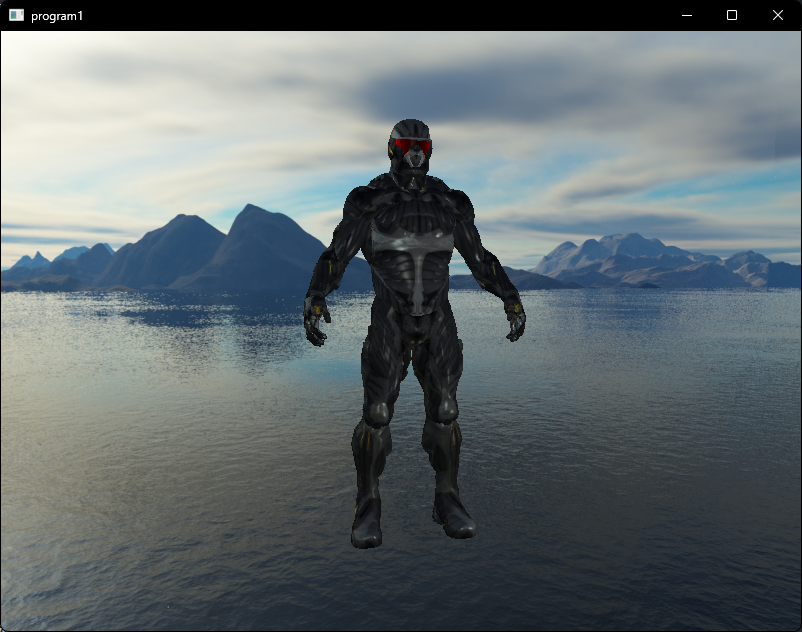
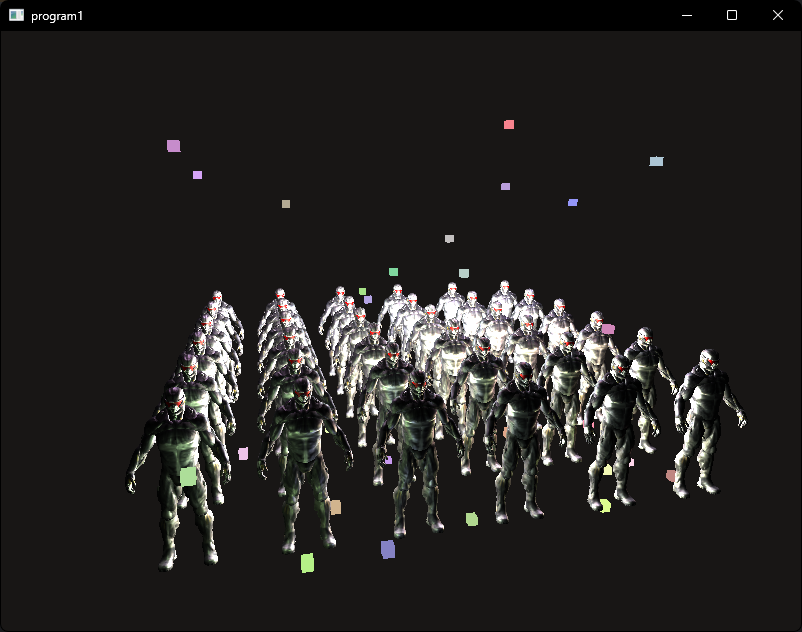
Many people learning OpenGL start with the LearnOpenGL tutorial. There are plenty of guides online for setting up an OpenGL environment, but most use Visual Studio as the IDE. CLion has a significant advantage over VS: you can configure multiple main functions via CMakeLists, meaning you don’t have to delete your previous code when moving on to later chapters — just create a new .cpp file with a new main function.
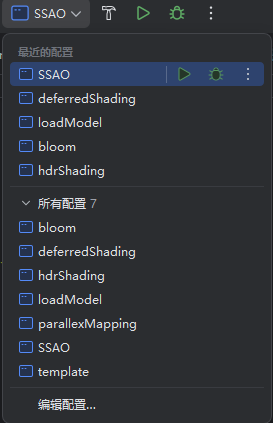
Since the model-importing library Assimp used in the LearnOpenGL tutorial does not have a precompiled MinGW version (and compiling it yourself with MinGW tends to throw errors), we will switch CLion to the Visual Studio toolchain to use Assimp without issues.
1. Switching CLion to the VS Toolchain
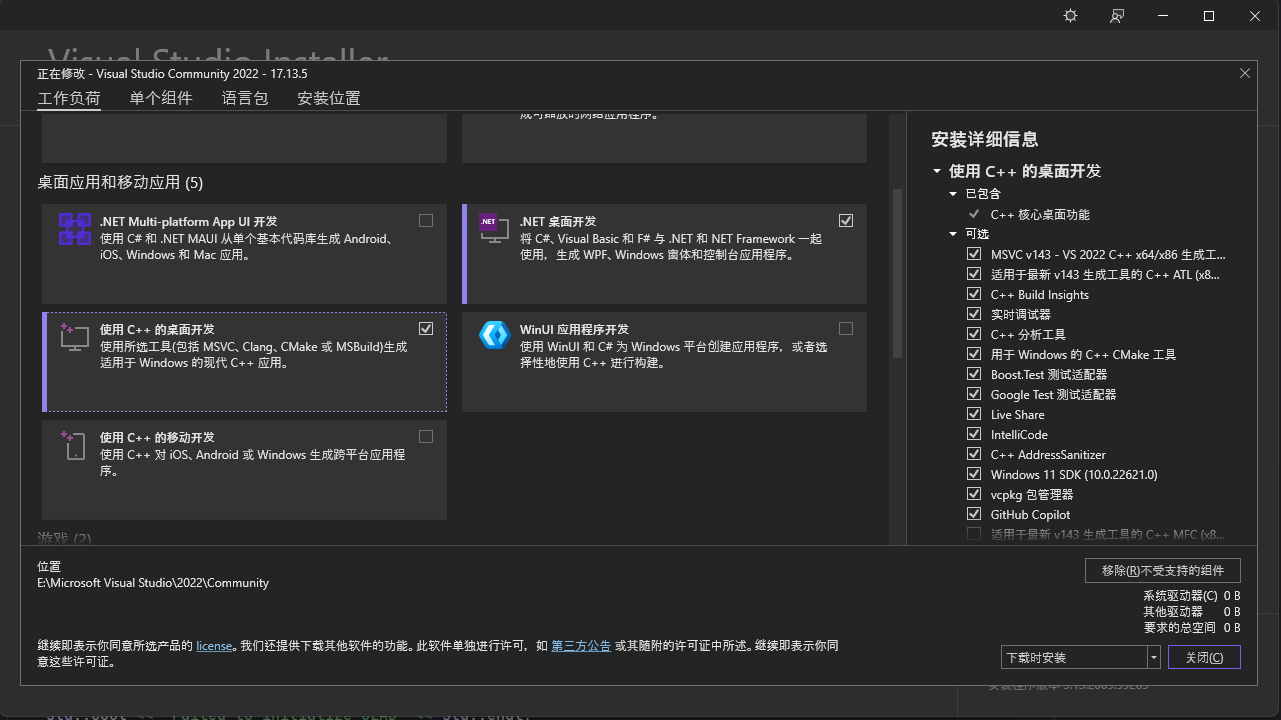
Before starting, make sure the Visual Studio C++ development environment is already installed.
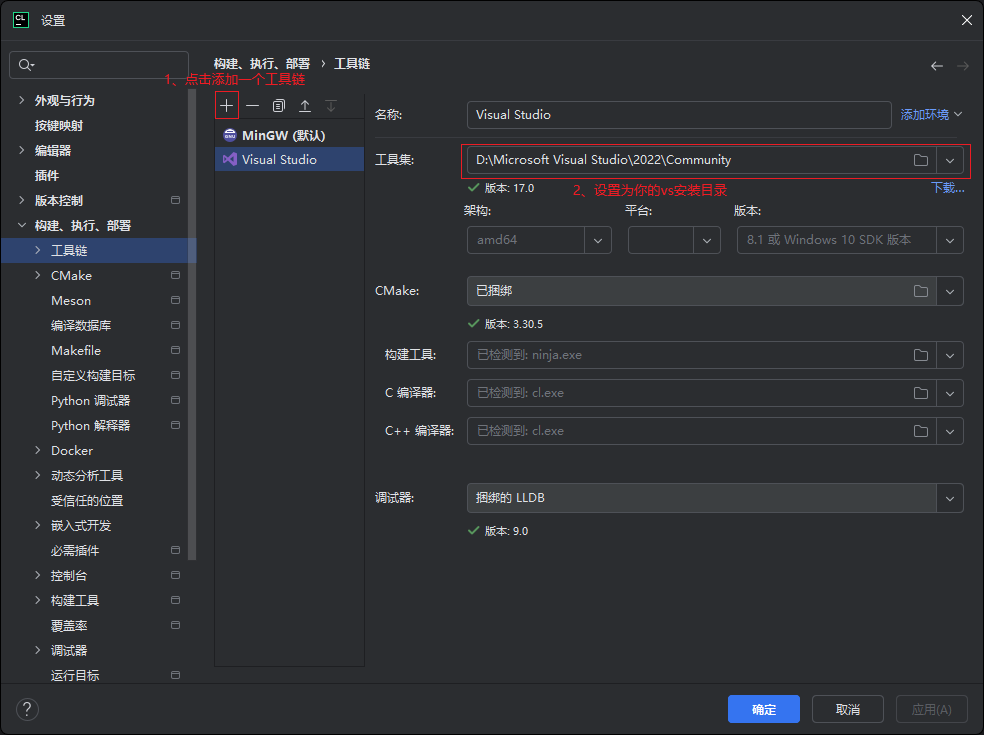
After creating a C++ project in CLion, go to Settings → Build, Execution, Deployment → Toolchains. Click Add to create a new toolchain. Set Toolset to your VS installation directory — the rest will be auto-detected. Click Apply.
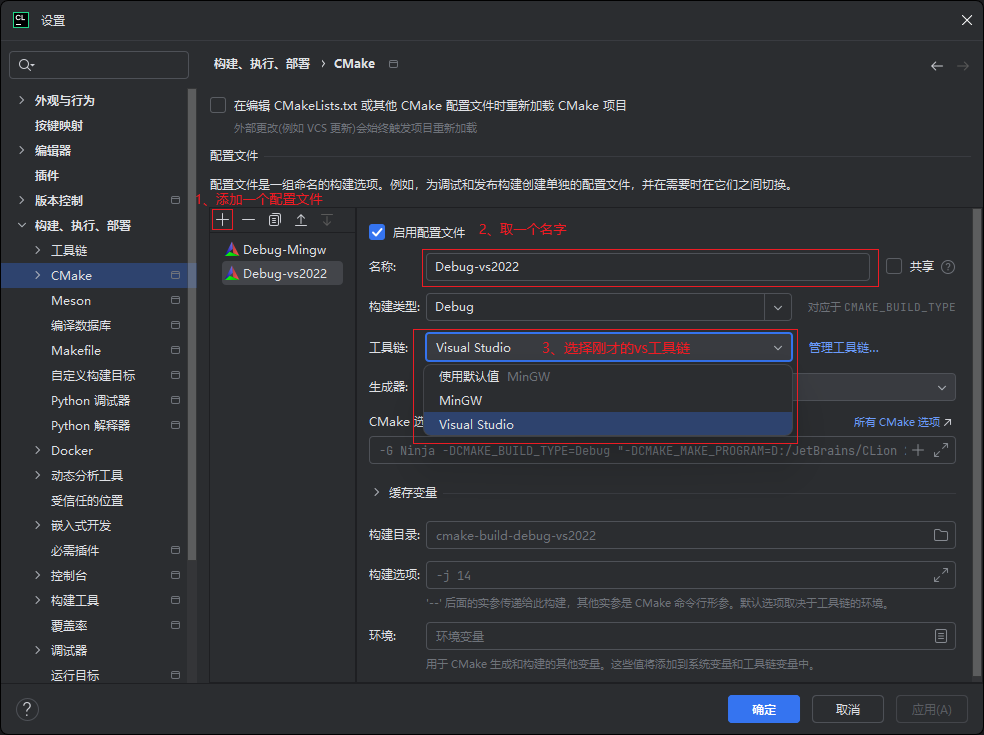
Then go to Settings → Build, Execution, Deployment → CMake. Click Add to create a new profile — name it something like Debug-vs2022. You can also rename the default MinGW profile to Debug-Mingw for clarity. Set Build type to Debug and Toolchain to the VS toolchain you just added. Click Apply then OK.
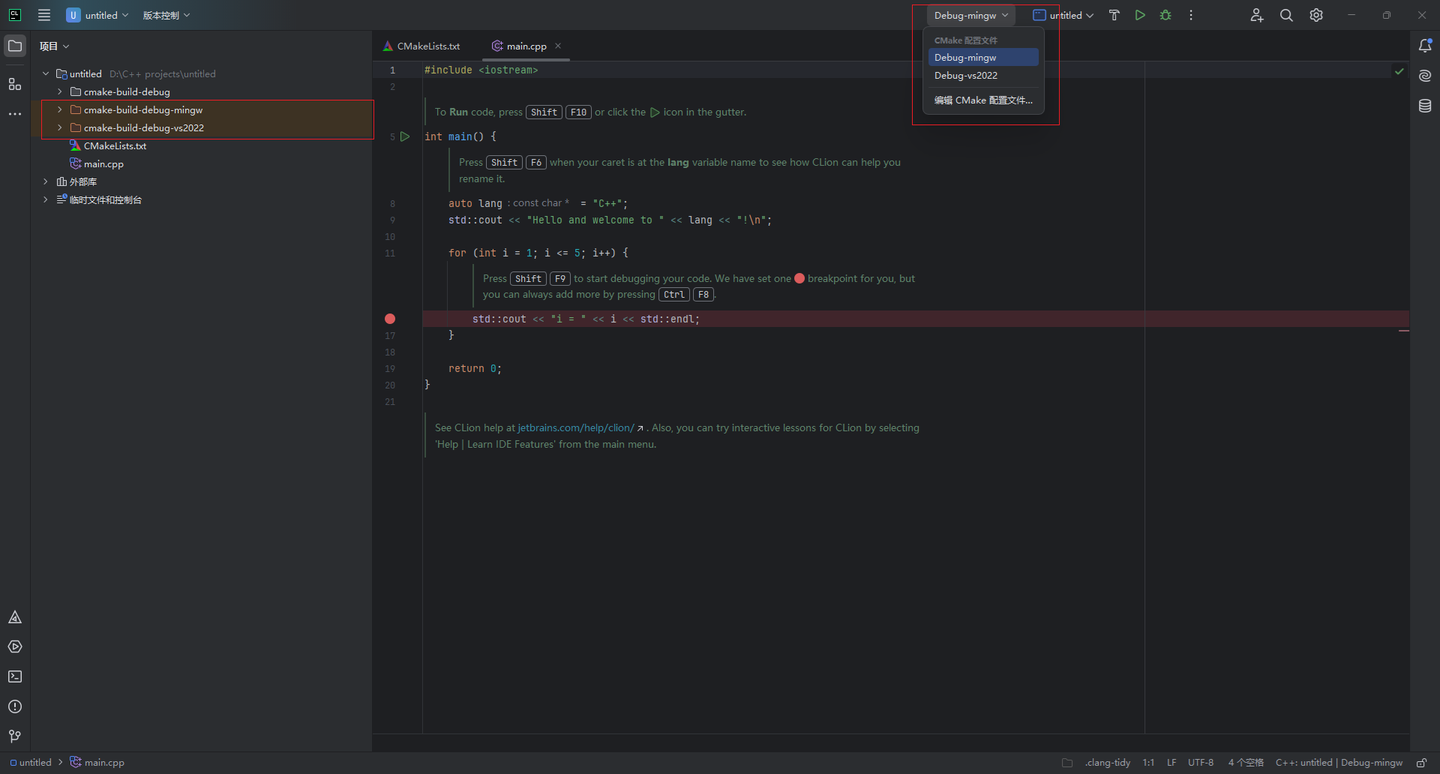
Two CMake profiles will now appear in the top-right dropdown, and two corresponding build directories will show up in the project tree on the left. Run a sample program with the VS profile to verify everything works.
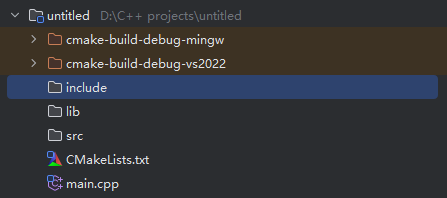
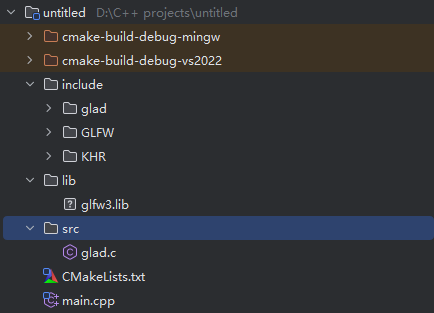
Next, create three directories under the project root: include, lib, and src.
2. Configuring GLFW
Go to the GLFW website — An OpenGL library | GLFW — download the source package and extract it. You should get the following directory structure:
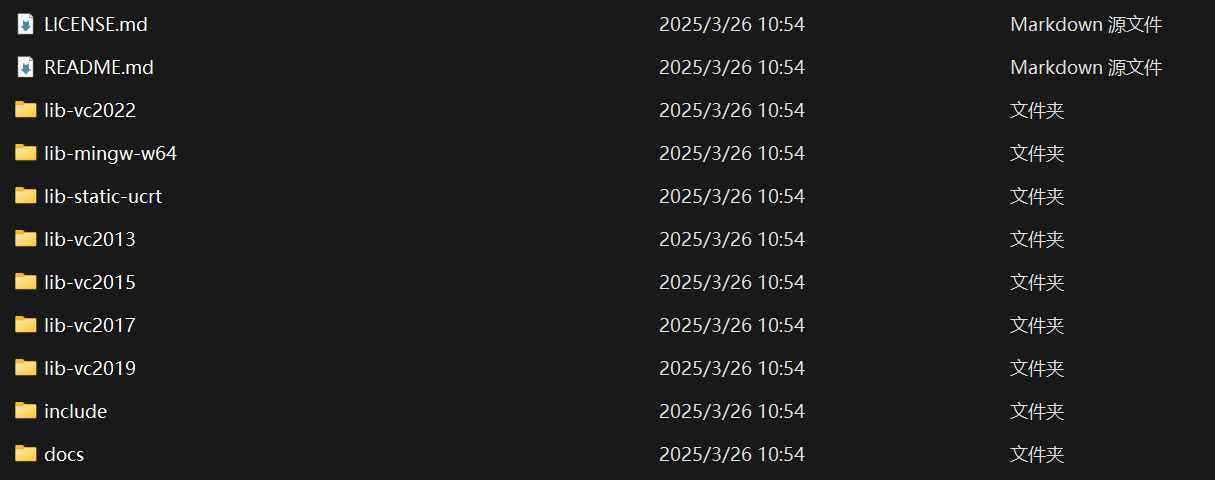
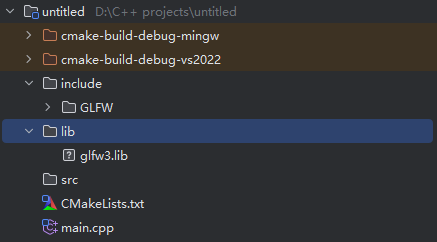
Copy the entire include/GLFW folder into your project’s include directory, and copy lib-vc2022/glfw3.lib into the lib directory.
3. Configuring GLAD
Go to the GLAD website — glad.dav1d.de — select the version you need, download and extract it. You should get something like this:
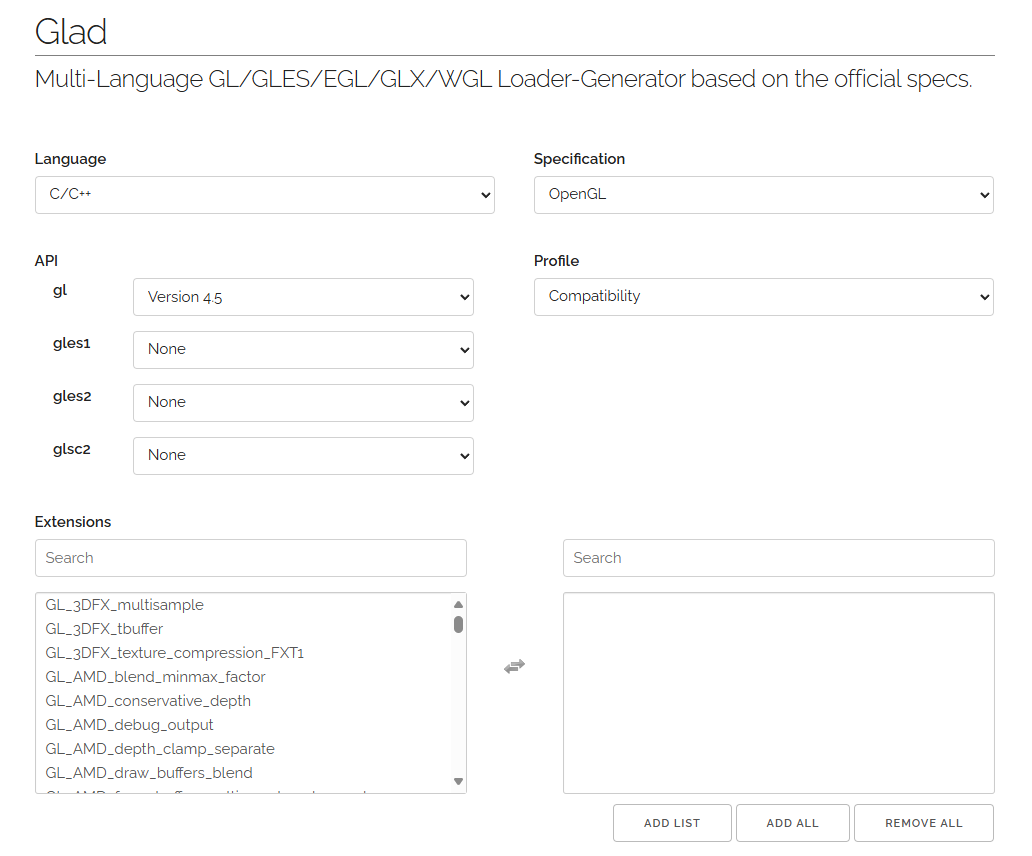

Copy both the include/glad and include/KHR folders into your project’s include directory, and copy src/glad.c into the project’s src directory.
4. Configuring Assimp
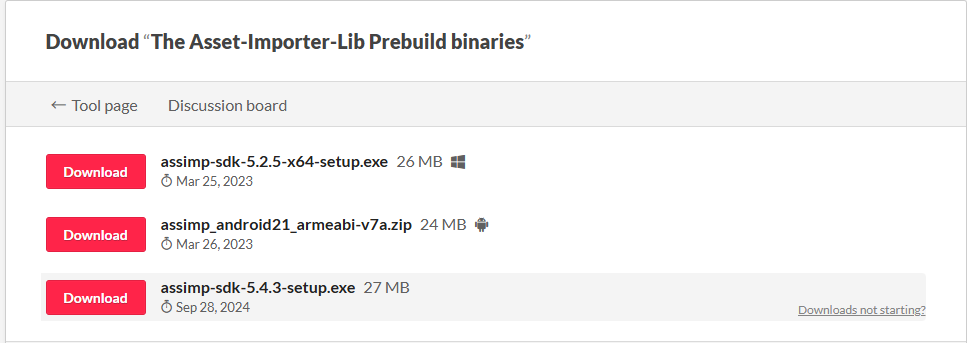
You can either pull the source from GitHub and compile it yourself, or download a pre-built version from kimkulling.itch.io/the-asset-importer-lib. The official site provides an .exe installer — download and install it to any directory.
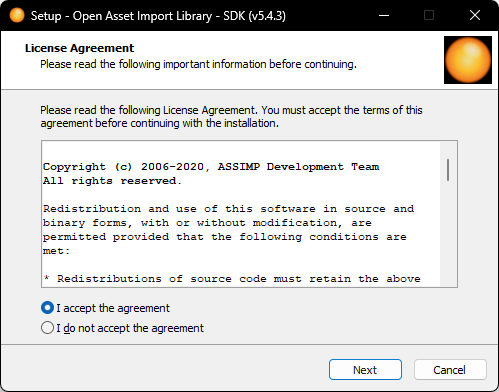
In the installation directory, copy the entire include/assimp folder into your project’s include directory. Copy lib/x64/assimp-vc143-mt.lib into the project’s lib directory, and copy bin/x64/assimp-vc143-mt.dll into the cmake-build-debug-vs2022 directory (the build directory corresponding to your VS CMake profile). After this, you can uninstall the Assimp installer — it’s no longer needed.
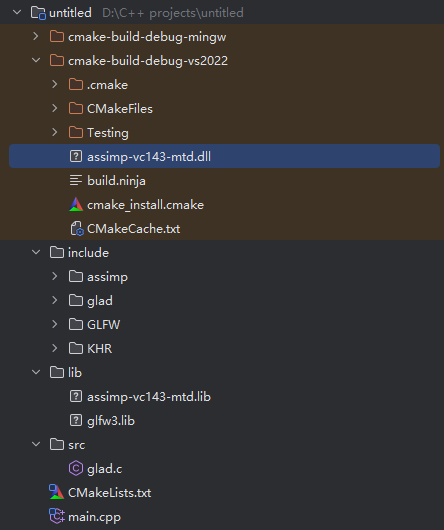
5. Other Configurations
GLM: Clone the GLM repository from GitHub and copy the glm folder into your project’s include directory.
stb_image: Place stb_image.h into the include directory.
No need to elaborate further here.
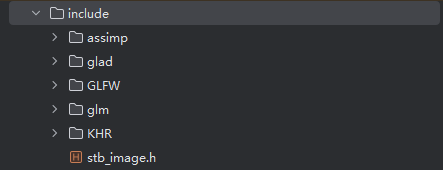
6. Configuring CMakeLists
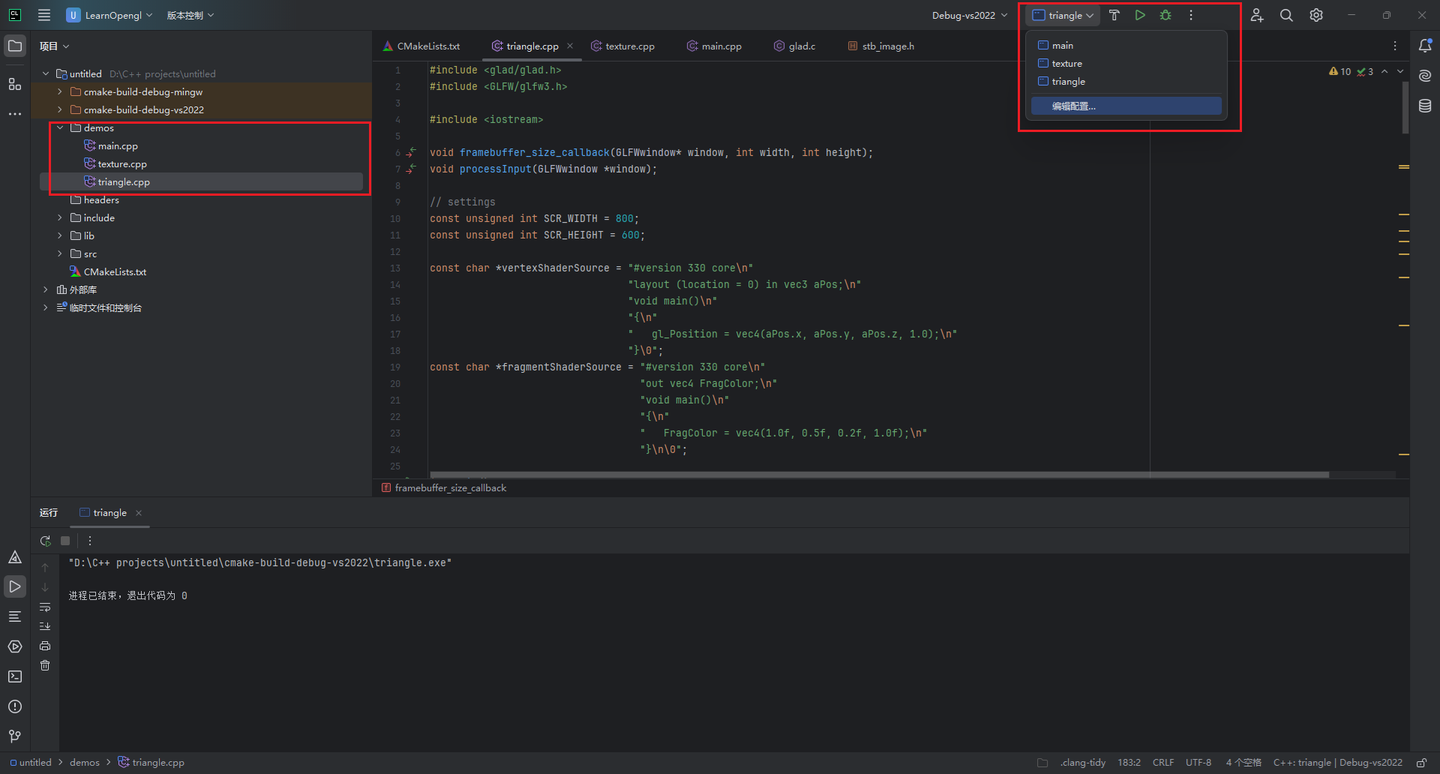
Create two directories under the project root: demos and headers. demos will hold the .cpp source files you want to run, and headers will contain your own header files such as camera.h, shader.h, etc. You could also put your headers directly under include instead of creating a separate headers folder, but keeping them separate is cleaner.
Now write the following in CMakeLists.txt:
cmake_minimum_required(VERSION 3.30)
project(LearnOpengl) # Replace with your project name

set(CMAKE_CXX_STANDARD 20)

include_directories(${PROJECT_SOURCE_DIR}/include ${PROJECT_SOURCE_DIR}/headers)
link_directories(${PROJECT_SOURCE_DIR}/lib)

file(GLOB files demos/*.cpp)
foreach (file ${files})
    string(REGEX REPLACE ".+/(.+)\\..*" "\\1" file_name ${file})
    add_executable(${file_name} src/glad.c ${file})
    target_link_libraries(${file_name} ${PROJECT_SOURCE_DIR}/lib/glfw3.lib)
    target_link_libraries(${file_name} ${PROJECT_SOURCE_DIR}/lib/assimp-vc143-mtd.lib)
endforeach ()
Right-click CMakeLists.txt and select Reload CMake Project. CLion will automatically generate a runnable configuration for every .cpp file inside the demos directory. Run the following code to verify that GLFW and GLAD are set up correctly:
#include <glad/glad.h>
#include <GLFW/glfw3.h>

#include <iostream>

void framebuffer_size_callback(GLFWwindow* window, int width, int height);
void processInput(GLFWwindow *window);

// settings
const unsigned int SCR_WIDTH = 800;
const unsigned int SCR_HEIGHT = 600;

const char *vertexShaderSource = "#version 330 core\n"
    "layout (location = 0) in vec3 aPos;\n"
    "void main()\n"
    "{\n"
    "   gl_Position = vec4(aPos.x, aPos.y, aPos.z, 1.0);\n"
    "}\0";
const char *fragmentShaderSource = "#version 330 core\n"
    "out vec4 FragColor;\n"
    "void main()\n"
    "{\n"
    "   FragColor = vec4(1.0f, 0.5f, 0.2f, 1.0f);\n"
    "}\n\0";

int main()
{
    // glfw: initialize and configure
    // ------------------------------
    glfwInit();
    glfwWindowHint(GLFW_CONTEXT_VERSION_MAJOR, 3);
    glfwWindowHint(GLFW_CONTEXT_VERSION_MINOR, 3);
    glfwWindowHint(GLFW_OPENGL_PROFILE, GLFW_OPENGL_CORE_PROFILE);

#ifdef __APPLE__
    glfwWindowHint(GLFW_OPENGL_FORWARD_COMPAT, GL_TRUE);
#endif

    // glfw window creation
    // --------------------
    GLFWwindow* window = glfwCreateWindow(SCR_WIDTH, SCR_HEIGHT, "LearnOpenGL", NULL, NULL);
    if (window == NULL)
    {
        std::cout << "Failed to create GLFW window" << std::endl;
        glfwTerminate();
        return -1;
    }
    glfwMakeContextCurrent(window);
    glfwSetFramebufferSizeCallback(window, framebuffer_size_callback);

    // glad: load all OpenGL function pointers
    // ---------------------------------------
    if (!gladLoadGLLoader((GLADloadproc)glfwGetProcAddress))
    {
        std::cout << "Failed to initialize GLAD" << std::endl;
        return -1;
    }


    // build and compile our shader program
    // ------------------------------------
    // vertex shader
    unsigned int vertexShader = glCreateShader(GL_VERTEX_SHADER);
    glShaderSource(vertexShader, 1, &vertexShaderSource, NULL);
    glCompileShader(vertexShader);
    // check for shader compile errors
    int success;
    char infoLog[512];
    glGetShaderiv(vertexShader, GL_COMPILE_STATUS, &success);
    if (!success)
    {
        glGetShaderInfoLog(vertexShader, 512, NULL, infoLog);
        std::cout << "ERROR::SHADER::VERTEX::COMPILATION_FAILED\n" << infoLog << std::endl;
    }
    // fragment shader
    unsigned int fragmentShader = glCreateShader(GL_FRAGMENT_SHADER);
    glShaderSource(fragmentShader, 1, &fragmentShaderSource, NULL);
    glCompileShader(fragmentShader);
    // check for shader compile errors
    glGetShaderiv(fragmentShader, GL_COMPILE_STATUS, &success);
    if (!success)
    {
        glGetShaderInfoLog(fragmentShader, 512, NULL, infoLog);
        std::cout << "ERROR::SHADER::FRAGMENT::COMPILATION_FAILED\n" << infoLog << std::endl;
    }
    // link shaders
    unsigned int shaderProgram = glCreateProgram();
    glAttachShader(shaderProgram, vertexShader);
    glAttachShader(shaderProgram, fragmentShader);
    glLinkProgram(shaderProgram);
    // check for linking errors
    glGetProgramiv(shaderProgram, GL_LINK_STATUS, &success);
    if (!success) {
        glGetProgramInfoLog(shaderProgram, 512, NULL, infoLog);
        std::cout << "ERROR::SHADER::PROGRAM::LINKING_FAILED\n" << infoLog << std::endl;
    }
    glDeleteShader(vertexShader);
    glDeleteShader(fragmentShader);

    // set up vertex data (and buffer(s)) and configure vertex attributes
    // ------------------------------------------------------------------
    float vertices[] = {
        -0.5f, -0.5f, 0.0f, // left
         0.5f, -0.5f, 0.0f, // right
         0.0f,  0.5f, 0.0f  // top
    };

    unsigned int VBO, VAO;
    glGenVertexArrays(1, &VAO);
    glGenBuffers(1, &VBO);
    // bind the Vertex Array Object first, then bind and set vertex buffer(s), and then configure vertex attributes(s).
    glBindVertexArray(VAO);

    glBindBuffer(GL_ARRAY_BUFFER, VBO);
    glBufferData(GL_ARRAY_BUFFER, sizeof(vertices), vertices, GL_STATIC_DRAW);

    glVertexAttribPointer(0, 3, GL_FLOAT, GL_FALSE, 3 * sizeof(float), (void*)0);
    glEnableVertexAttribArray(0);

    // note that this is allowed, the call to glVertexAttribPointer registered VBO as the vertex attribute's bound vertex buffer object so afterwards we can safely unbind
    glBindBuffer(GL_ARRAY_BUFFER, 0);

    // You can unbind the VAO afterwards so other VAO calls won't accidentally modify this VAO, but this rarely happens. Modifying other
    // VAOs requires a call to glBindVertexArray anyways so we generally don't unbind VAOs (nor VBOs) when it's not directly necessary.
    glBindVertexArray(0);


    // uncomment this call to draw in wireframe polygons.
    //glPolygonMode(GL_FRONT_AND_BACK, GL_LINE);

    // render loop
    // -----------
    while (!glfwWindowShouldClose(window))
    {
        // input
        // -----
        processInput(window);

        // render
        // ------
        glClearColor(0.2f, 0.3f, 0.3f, 1.0f);
        glClear(GL_COLOR_BUFFER_BIT);

        // draw our first triangle
        glUseProgram(shaderProgram);
        glBindVertexArray(VAO); // seeing as we only have a single VAO there's no need to bind it every time, but we'll do so to keep things a bit more organized
        glDrawArrays(GL_TRIANGLES, 0, 3);
        // glBindVertexArray(0); // no need to unbind it every time

        // glfw: swap buffers and poll IO events (keys pressed/released, mouse moved etc.)
        // -------------------------------------------------------------------------------
        glfwSwapBuffers(window);
        glfwPollEvents();
    }

    // optional: de-allocate all resources once they've outlived their purpose:
    // ------------------------------------------------------------------------
    glDeleteVertexArrays(1, &VAO);
    glDeleteBuffers(1, &VBO);
    glDeleteProgram(shaderProgram);

    // glfw: terminate, clearing all previously allocated GLFW resources.
    // ------------------------------------------------------------------
    glfwTerminate();
    return 0;
}

// process all input: query GLFW whether relevant keys are pressed/released this frame and react accordingly
// ---------------------------------------------------------------------------------------------------------
void processInput(GLFWwindow *window)
{
    if (glfwGetKey(window, GLFW_KEY_ESCAPE) == GLFW_PRESS)
        glfwSetWindowShouldClose(window, true);
}

// glfw: whenever the window size changed (by OS or user resize) this callback function executes
// ---------------------------------------------------------------------------------------------
void framebuffer_size_callback(GLFWwindow* window, int width, int height)
{
    // make sure the viewport matches the new window dimensions; note that width and
    // height will be significantly larger than specified on retina displays.
    glViewport(0, 0, width, height);
}
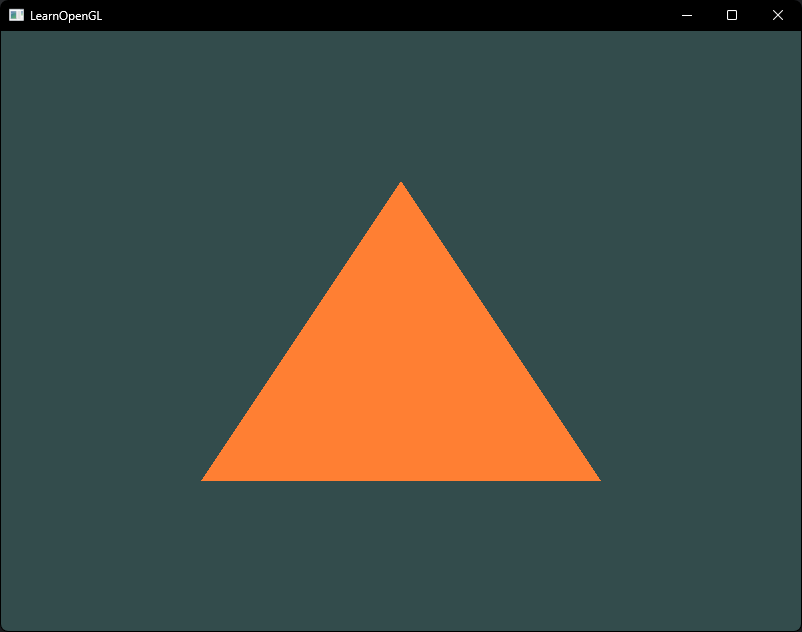
You can also grab any model file and run the following code to verify that Assimp is set up correctly:
#include <assimp/Importer.hpp>
#include <assimp/scene.h>
#include <assimp/postprocess.h>
#include <iostream>

int main() {
    Assimp::Importer importer;
    const aiScene* scene = importer.ReadFile("path_to_your_model.obj", aiProcess_Triangulate);
    if (!scene) {
        std::cerr << "Error: " << importer.GetErrorString() << std::endl;
        return -1;
    }
    std::cout << "Assimp OK, load model succeed." << std::endl;
    return 0;
}
As you learn new content, simply create a new .cpp file inside the demos directory and reload the CMake project. No need to clear out your previous work — you can always revisit what you’ve learned. Put your own header files inside the headers directory.
Happy learning!